One year ago from today, I picked up lettering as a brand new hobby. In order to make sure I was fully committed, I created myself an Instagram account and signed myself up to the #365daysofhandlettering challenge. 365 days later, I am proud to say I’ve accomplished my goal. Looking back at my posts from my earlier days of hand lettering, I can say with full confidence that my skills have improved tremendously. For my very first blog post, I’d like to share with you some tips and tricks that I believe would be very useful for those of you who may have recently picked up hand lettering as a hobby!
TIP #1: MASTER THE BASICS
When I first began practicing, I didn’t want to invest in any special pens or markers. After all, some of these pens can be super expensive and at the time I wasn’t sure how committed I’d be with my new hobby. So I picked up my Pilot G2 ball point pen which I always used to take notes in class and began practicing what many people call “faux-calligraphy".
Faux-calligraphy is a method in which you write out your letters in cursive with a mono-linear tool such as a pen or pencil, and tweak the writing afterwards to mimic calligraphy letterforms. Once the letters are written out, you simply outline the downward strokes of each letter as shown above. Keep in mind, you should make sure the weight of the downward strokes are all even! Next you carefully fill in the open gaps between the the lines to give the letters a nice, full "brush stroke" effect.
After experimenting with the weight of the outlines, you'll begin to get a better sense of the proper ratio between the thin strokes and thick strokes. In my early days I used this method on a daily basis, replicating any quotes or prints I’d find on Instagram and Pinterest. I really recommend all beginners to at least try this out before picking up a brush pen because it helps you focus on your letterforms without being so distracted by the flexibility of the tip of your brush pen or pointed pen. This would also save you from wasting precious ink on your brush pens and damaging the tip from over-usage while you’re still trying to figure out how to handle the pen.
TIP #2: WHEN YOU THINK YOU'RE READY, UPGRADE
As stated in my previous post, don’t immediately invest in expensive brush pens or pointed pens. You’ll probably end up getting frustrated because your letters aren’t drawn out the way you want it to look! After a lot of practice I promise you’ll eventually feel more comfortable with your hand motions, at which point you can consider switching to a better pen. Depending on your style choice, there are tons of pens available for every creative soul. Below I have listed two of my favorite hand lettering pens and their characteristics. Traditional pointed pen calligraphy requires very different tools and skill sets but I’ll be sure to cover those in a future blog post so stay tuned!
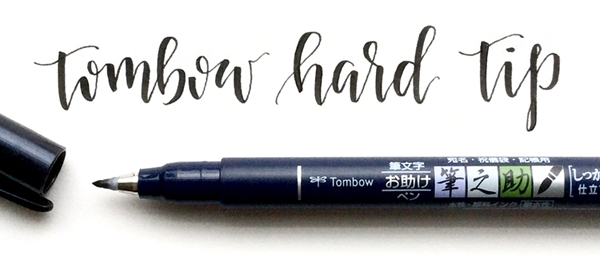
Tombow - Hard Tip Fudenosuke Pen
This pen is my absolute favorite. I use this for most of my artwork that’s posted on my Instagram page and is probably the best brushpen for beginners. The tip is hard enough to give you full control and the weight of your strokes can be easily maintained by adjusting the angle and amount of pressure you put on the pen. Be careful not to apply too much pressure on it though, or else the tip will eventually become more dull.
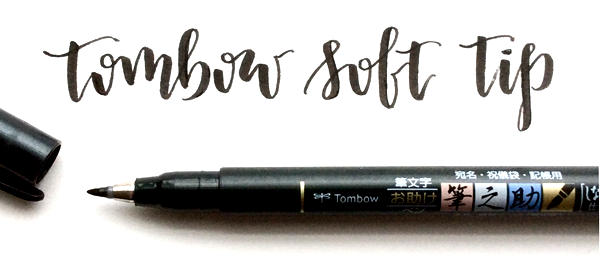
Tombow - Soft Tip Fudenosuke Pen
This pen also works like wonders. The soft tip gives you a little more flexibility, allowing you to have a greater range of thickness with your letterforms. However, this also means you need to have more control over your handwriting so it may require a wee bit more practice and patience. Luckily, both of these pens come as a set for less than 8 dollars if you order them on Amazon!
TIP #3: SOCIAL MEDIA IS YOUR FRIEND
These days, there are so many inspirational accounts on Instagram that showcase beautiful calligraphy artwork! As I write this blog, there are currently over 1.3 million photos tagged #handlettering and over 2.2 million photos tagged #calligraphy. That's insane! If you're still trying to figure out your style, whether you want to focus on modern calligraphy or traditional calligraphy, chalk lettering or brush lettering, there are so many designers you can follow that have completed tons of projects and have had years of practice. By simply following these accounts and having their photos show up on your daily newsfeed, you can get your creative juices flowing and start brainstorming different ideas you may have in mind.
But don't stop there...
Keep challenging yourself. For me, creating my own account and being an active participant in the hand lettering Instagram community through the #365daysofhandlettering challenge really helped me push myself to keep practicing. By forcing myself to submit a post everyday, I was constantly doodling in my notebooks and experimenting with different fonts and styles. In addition there are so many friendly, supportive Instagram users out there that have given me awesome feedback and positive comments since Day 1. If it weren't for these users, I don't know where I would be right now!
Lastly, maintaining an Instagram account also helped me keep track of all my artwork in one location. Sometimes I would catch myself doodling on a cup that I'm about to throw away or wondering which notebook out of the ten different ones I store has the specific drawing that I'm looking for. Even for someone like me that's extremely organized, it could take me hours trying to look one doodle. Thankfully with my account, I can easily scroll back to my older posts and look back on all the different quotes I've drawn out. It's also a lot of fun looking through all the progress I've made in the past twelve months! :)
As you begin your lettering journey, I hope these tips and tricks become useful for your every day practice. If you would like me to cover any other topics on hand lettering, feel free to reach out to me using the comment box below. Happy lettering!


